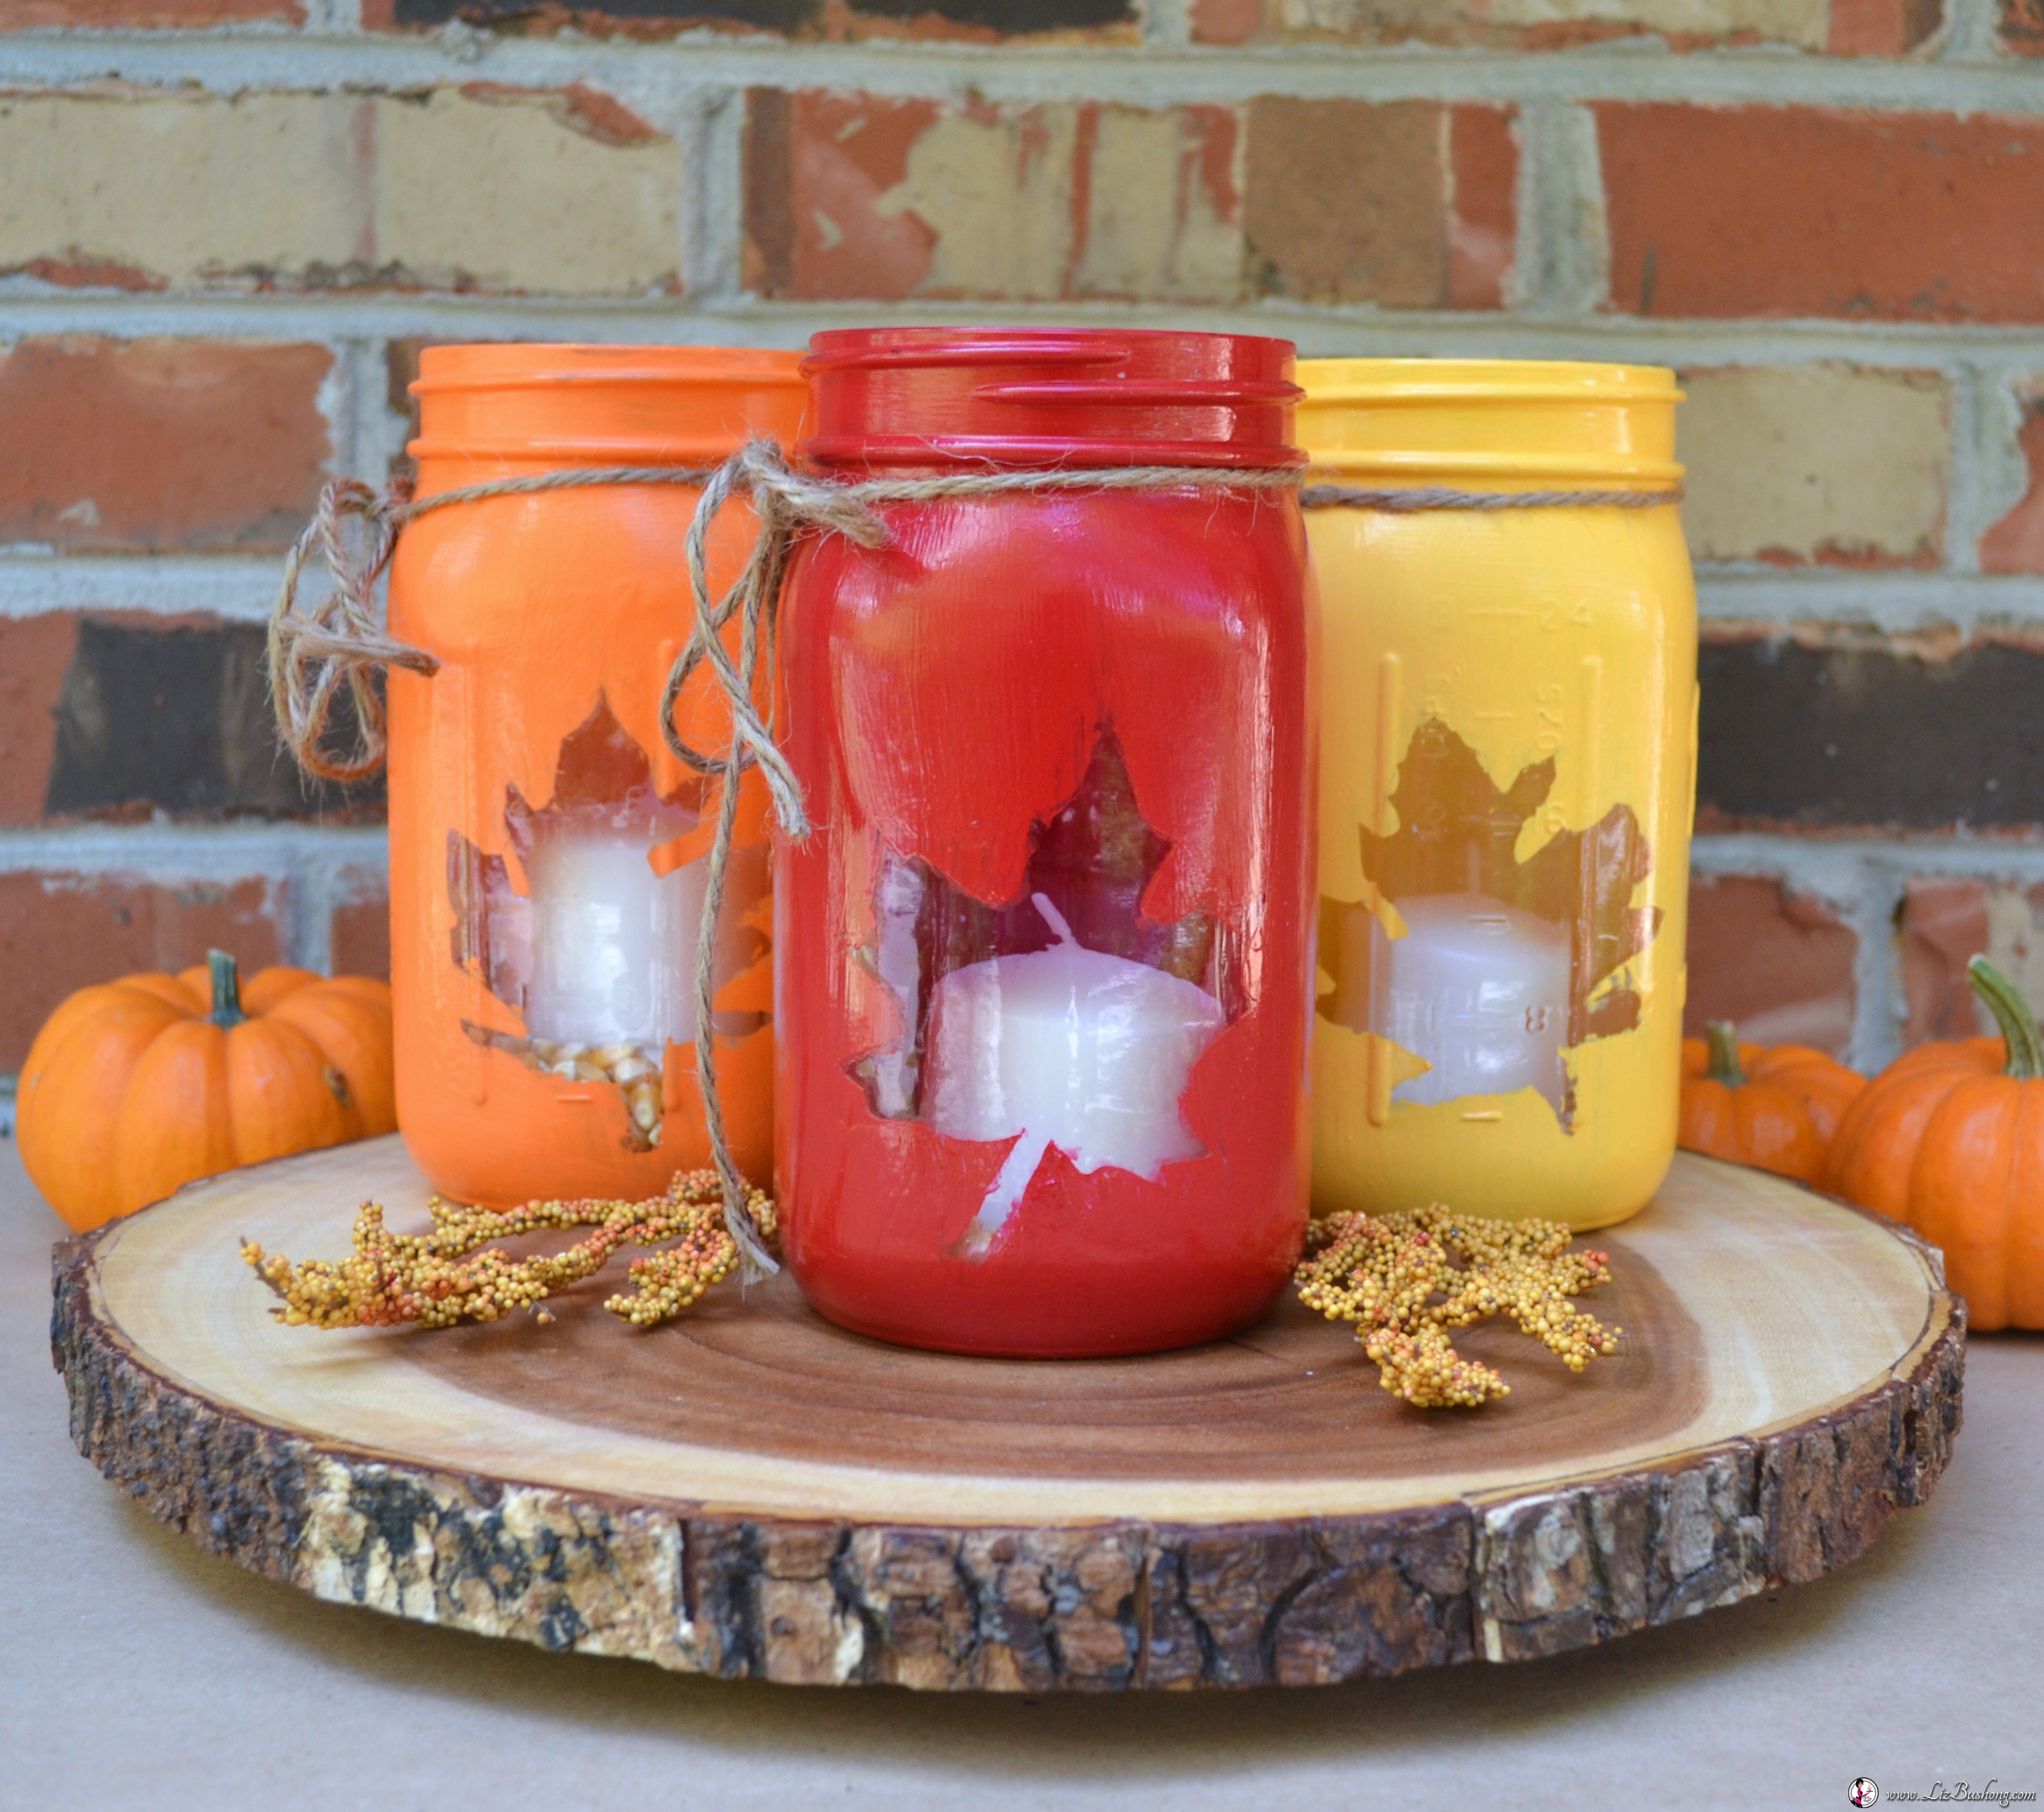
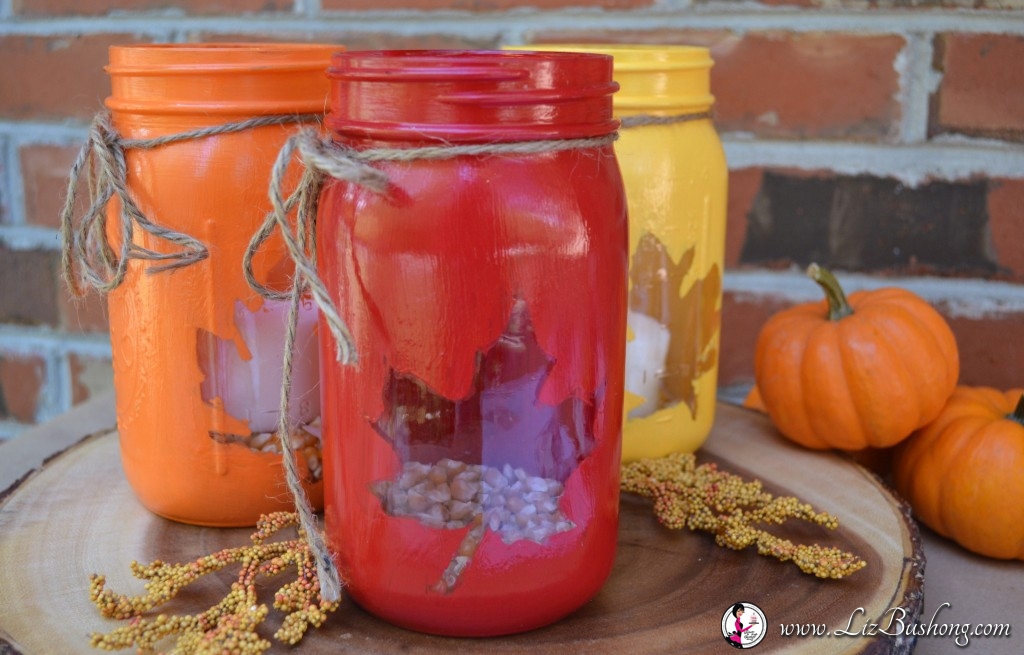
Would you like to greet your friends and family with illuminated autumn mason jar luminaries? Create Mason Jar Luminaries using large mouth mason jars, glossy craft paint, and autumn leaf stencil. Decide how many jars you will need and think about the fall colors for paint to create your own sidewalk of Mason Jar Luminaries.
Once your jars are painted and dried, fill with popcorn kernels or other filler to hold a votive candle in position. Line your sidewalk, walk way or even arrange on a platter for a table centerpiece. These are fun to make and look so pretty all lit up. A special thank you for Sugar Bee Crafts who inspired this fun idea.

How to Make Mason Jar Luminaries
First determine how many luminaries you want to make then purchase wide mouth mason jars needed for the project. You can find mason jars at grocery stores and tractor supply… even online. If you are not a canning person, not to worry you will be painting these jars and not using for canning purposes.
Begin with wide mouth mason jars and a leaf pattern . You want the wide mouth jars so you can get your hand in to light the votive candle and for weight during outdoor weather.
After making one or two they were not turning out the way they should. I couldn’t figure out why the paint was pulling off after I removed the vinyl adhesive leaf. TA DA! My husband said “why don’t you pull the vinyl off while the paint is wet?”. Brilliant idea! Why don’t I? The process went a lot easier after painting only the front of the jar over the edges of the vinyl leaf and while the paint was wet, removed the vinyl stencil with a perfect print of the leaf pattern.
Materials Needed for the Mason Jar Luminary
Wide mouth Mason Jars or Kerr Canning Jars
Craft Paint made for glass- tested- Michael’s store brand- Crafts Smart- red, green, yellow & orange
Small sponge brush & flat edge half inch brush
Scissors, leaf pattern, peel and stick vinyl contact paper
Twine or raffia to decorate jar
Popcorn to fill the jar & 2-3″ votive candle
Mason Jar Luminary Tutorial
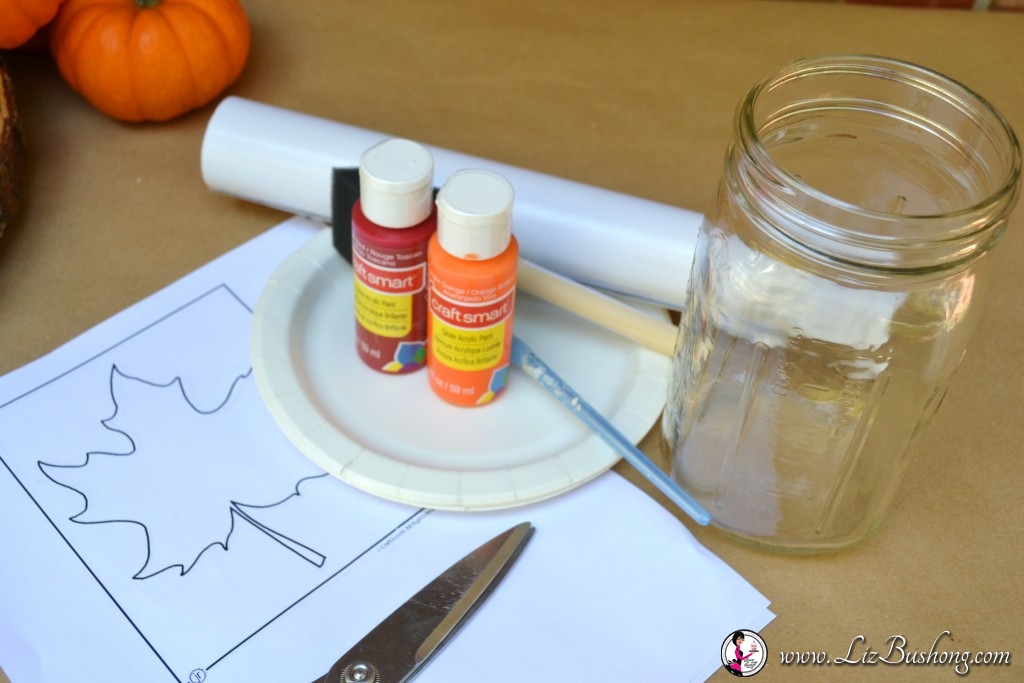
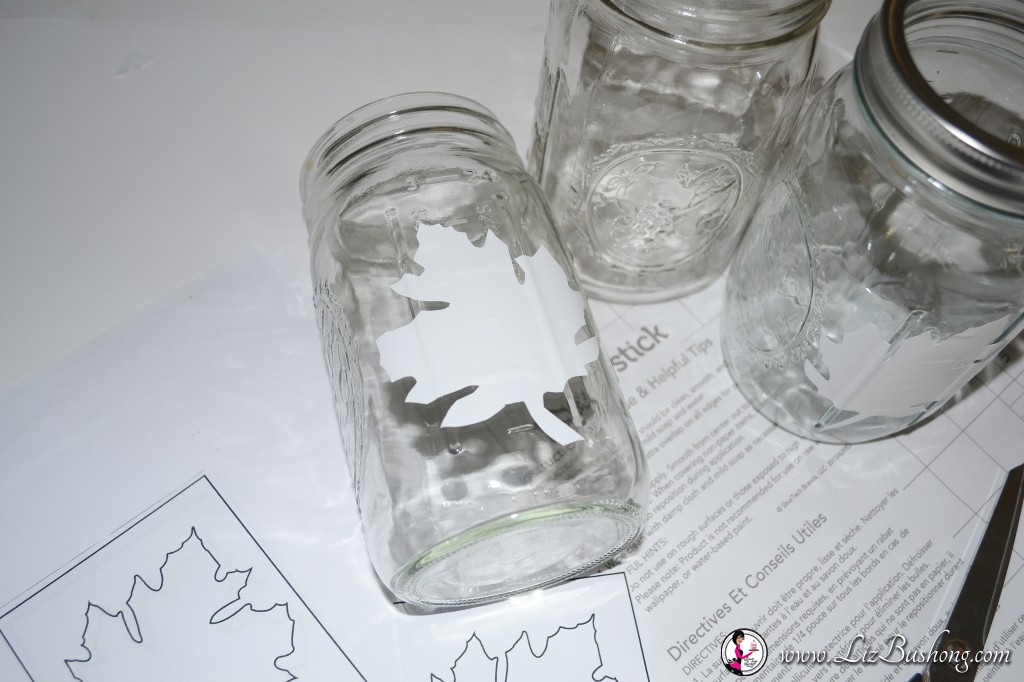
Download a leaf pattern from link and reduce the size to 70 % or the size you need to fit the front of the jar. Make several copies of this reduced size leaf pattern. You will be cutting each jar’s leaf pattern from this printed or copied leaf. I found that to be easier than tracing the leaf onto the contact paper.
Hold the pattern and contact paper, grid side up, and cut out shape following your paper pattern. Cut one leaf for each wide mouth jar. Peel the backing off the contact paper and adhere the pattern to the side of the jar you want to highlight the leaf. I used the side of the jar without the embedded printing or name of the jar.
Ready to paint the jar. I used gloss paint, because it is made for glass, it is acrylic and will set up with a shiny coat, so you will not have to seal the jar. For these jars I used three coats of paint. I could get 5 jars with one small bottle of paint. So for all 17 luminaries I purchased 2 bottles of paint in the 3-4 colors. Green is not shown in photo. PAINT THE OUTSIDE OF THE JAR ONLY!
Using your sponge brush, brush a light coat over the edges of the leaf stencil, next, pounce the sponge brush around the edges of the leaf to apply a good solid coat, then with the flat edge paint brush, paint the entire front of jar. With the paint still wet, carefully, peel the adhesive leaf off the jar. You should have a perfect leaf imprint. If not, you can place the jar over running water and remove the wet paint. Dry the jar and start over. However, you should not have to do that. Mine worked great. It is messy, but you are crafting. It is supposed to be messy. xo
TIP: While the paint is still wet, this is the secret to getting the perfect imprint. Remove the contact paper leaf while paint is wet. Otherwise if you wait until they are completely dry, you pull the paint off the jars!
Allow this to dry before adding any more coats of paint to the jars. When dry, paint the jars , allowing the paint to dry between coats.
You will need to plan ahead if you need these for a party or an event. They take about 48 hours to completely dry. I did not paint the inside of the jar!
When Mason Jar’s are dry, add your twine or ribbon, the popcorn, and candle. You are good to go.. so go light up the world!
Good Day Tri-Cities featured this fun fall craft.
Helping you Make a Statement, Make it Sassy and Make it Yours! ®
Other Ideas You Might Like to Try: