
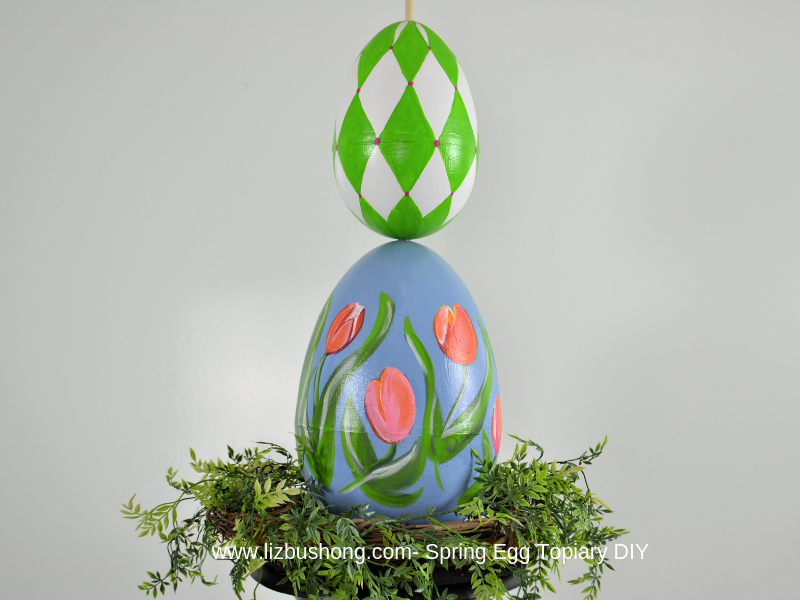
Decorate your front porch with a Spring Egg Topiary with this easy DIY project. The topiary begins with drilling 1/2″ holes in the ends of 3 graduated sized painted plastic eggs that are stacked together with a dowel rod secured in plaster of Paris. Similarly the eggs are painted with acrylics with spring colors in tulips, diamonds and plaid designs. These pretty topiaries will look great on our front porch in your favorite urn.
How to Make the Egg Topiary

Materials Needed
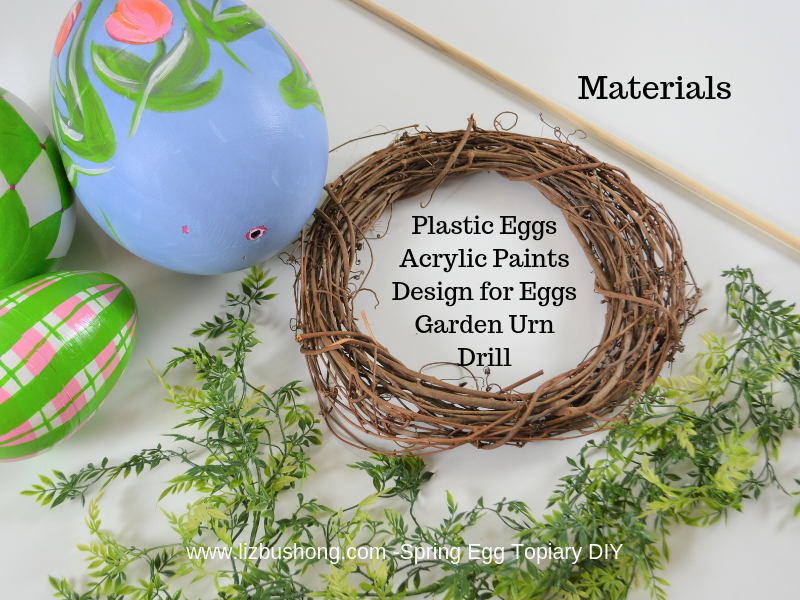
Material Supply List for One Topiary
- 12″ grapevine wreath
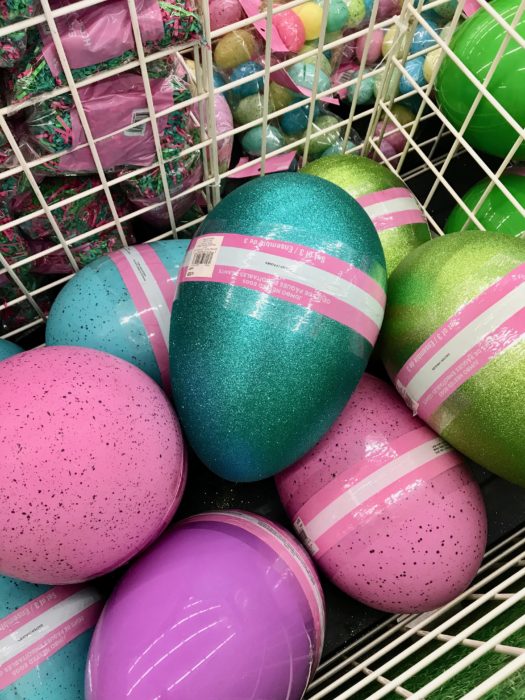
- Plastic eggs – 3 graduated sizes
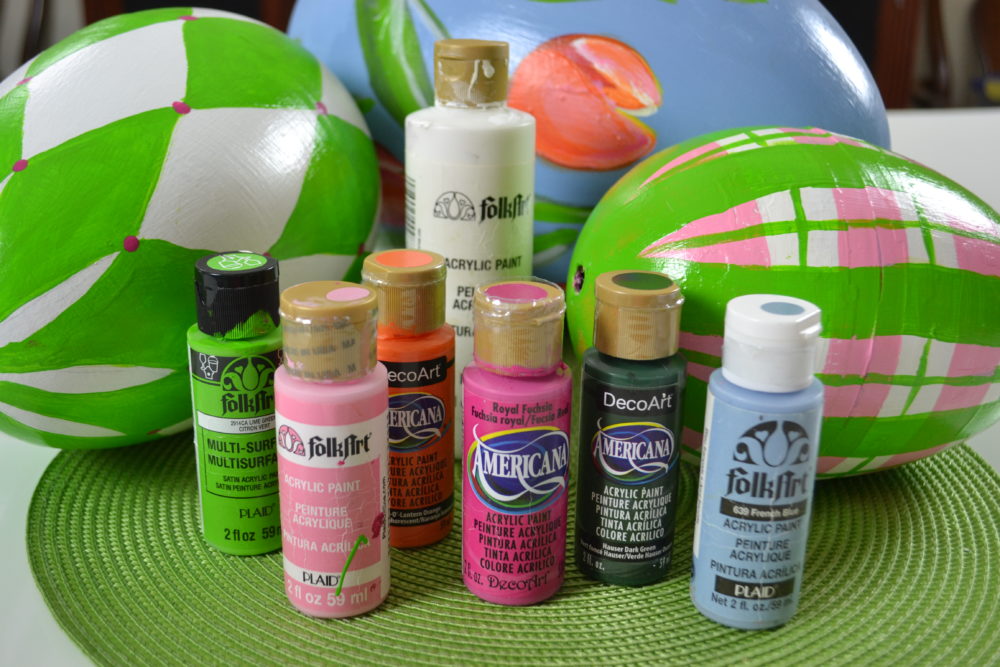
- Acrylic Paints- colors of choice + white
- Paint brushes- 1″ flat and small round liner
- Kilz primer+ regular paint brush
- 1/2″ dowel rod
- 1/4″ plywood cut to fit top circumference of urn
- Garden urn +paint to match urn
- 4″ x 4″ milk carton
- Plaster of Paris- small container
- Faux vine
- drill with 1/2″ drill bit
Painting the Eggs
First decide on the design or pattern you want your eggs to look like. I knew I wanted diamonds, plaid and tulips so I found photos of those elements and painted the designs free hand. If you don’t do free hand, an easy way to decorate the eggs is with stickers, painted dots, stripes, or decals. You can also decoupage the eggs with mod podge and paper printed napkins.
I used acrylic paint colors Hauser Dark Green, Lantern Orange, Bright Baby Pink, Royal Fuchsia, Lime Green and White.
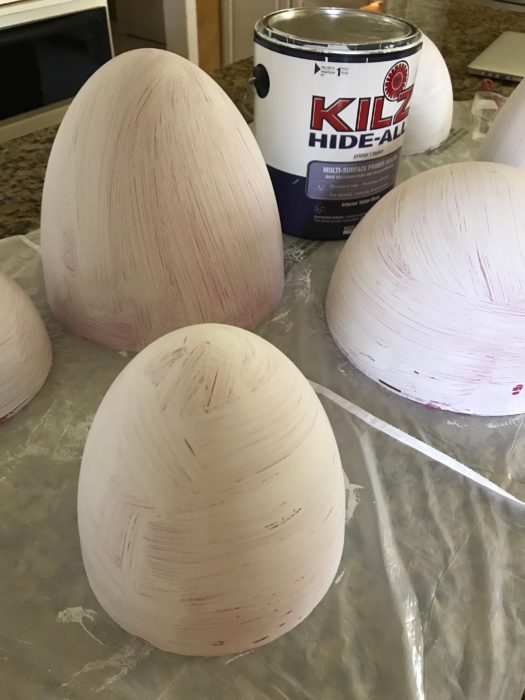
Before you begin painting, you will need to drill openings for the 1/2″ dowel rod in the bottom and top of the large and medium sized eggs, for the top egg, drill an opening only in the bottom.
Tip: It is easier to drill the openings if the eggs are separated, but keep the egg halves of the same egg in one place to make it easier for you to put the egg together after primer is dry.
Next the eggs are primed with kilz. I used three coats to completely cover the bright plastic eggs.
Tip:You have to use the primer to keep the acrylic paint on the eggs, if you paint the color or design with out the primer the colors will be off and will not stick to egg.
Next paint the eggs with pure white acrylic paint. Allow to dry overnight.
Painting the Plaid
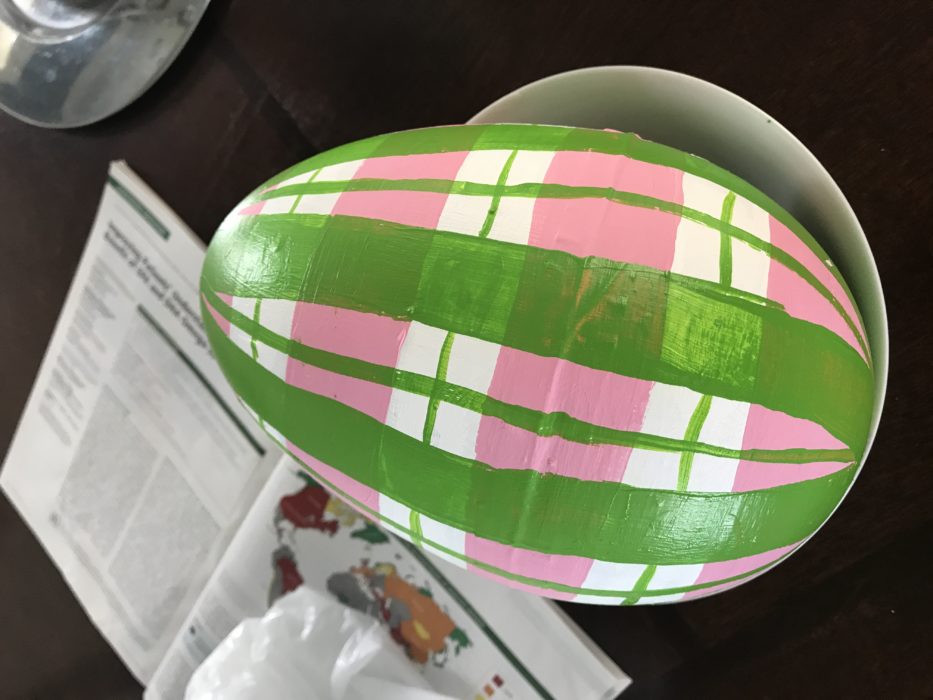
To paint a plaid, use three paint colors and two brushes. A 1″ flat brush for bands and a small round brush for thin lines. My egg was painted pure white acrylic, then 1″ wide bands of pink were painted horizontally, beginning in the middle of the egg working toward the top, then middle to bottom.
Second, paint vertical 1″ bands of lime green from top to bottom of egg, beginning in front of you then the back of egg. Divide the egg in equal sections to complete the banding.
Last, paint a thin green line using round brush liner on the white and pink bands horizontally and vertically. You will be able to see the pattern as you go.
Painting the Diamonds
Painting the oval eggs with a diamond pattern is a bit tricky for the center diamond will be the only diamond the true size. Because the egg is oval the diamonds on both ends will be elongated and narrow. I made a pattern on paper with the length and width of the overall egg size. With this size I divided the measurement into 3rds knowing I wanted 3 diamonds on the egg. Using a pencil, I sketched out the diamond shapes beginning with the center diamond then working towards the top, middle to bottom.
Tip: After you have the design the way you want it, using a wet paper towel will help remove unwanted pencil lines. Don’t use an easer, it will make smudge marks.
Paint the diamonds lime green or your color of choice. For the dots on the points of the diamonds, use the end of your 1″ brush, dip in paint and dot in place on the egg. Easy Peasy and perfectly round.
Tip: Practice paint brush dots on paper plate before applying to finished piece to get your technique.
Painting the Tulips
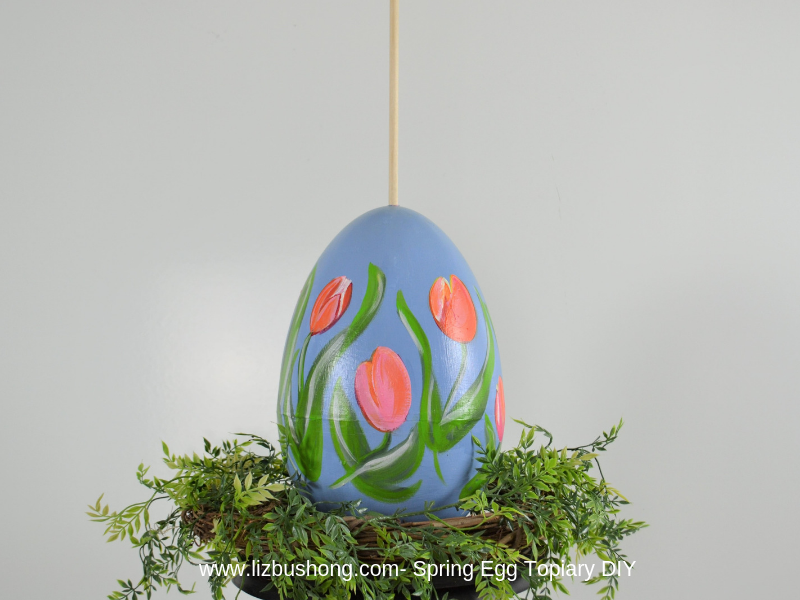
My tulips began with the flower then the stems/leaves. I painted the base of the egg french blue, ( to help the colors pop), then painted the tulip heads in white so I had a pure base before I added my color. After that dried, I painted tulips pink with orange and white highlights.
After all the eggs are painted and completely dry. Lightly spray the eggs with Crystal Clear Enamel
Topiary & Assembly
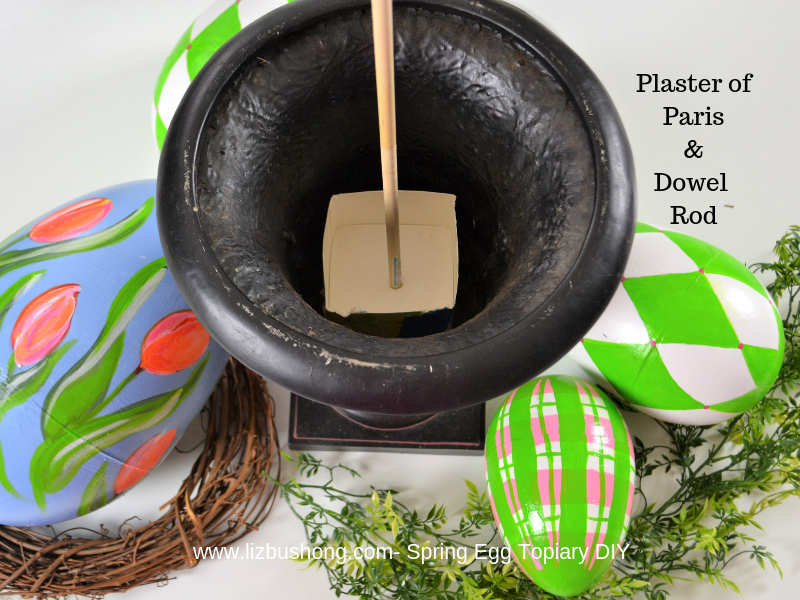
Cut milk carton 5″ from bottom, this is your base for the Plaster of Paris and the dowel rod.
Cut dowel rod to fit your finished height of project with the inside of the urn being your starting measure to the top of the three eggs. Mine was 40″.
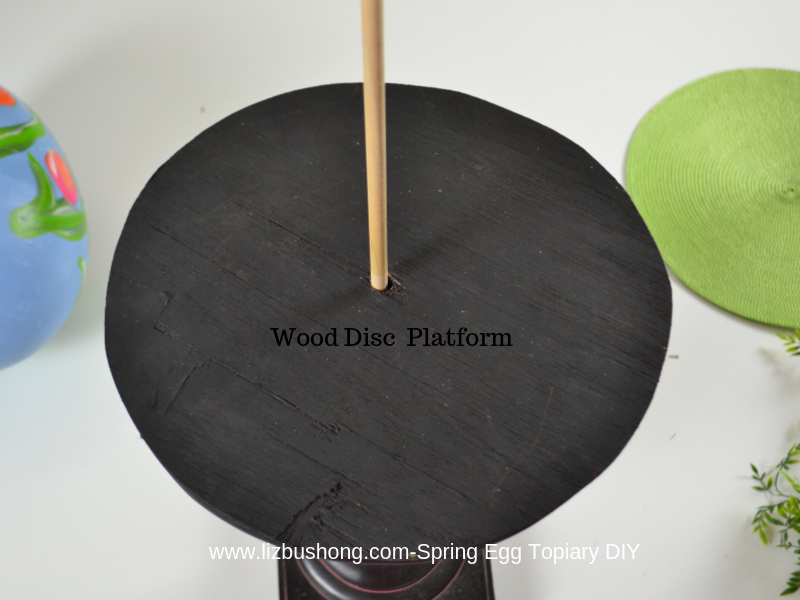
Cut the 1/4″ plywood the circumference of the urn. Drill 1/2″ opening in the center of the disc. Paint the plywood to match the urn. My urn was black so I painted the disc black for cohesive look.
Mix together the Plaster of Paris as per box directions and pour into milk carton mold. Insert dowel rod into center of the plaster, hold for a few minutes until plaster somewhat hardened. Place the carton with dowel in the urn and place the disc over the dowel. This will help the plaster and dowel stay vertically straight.
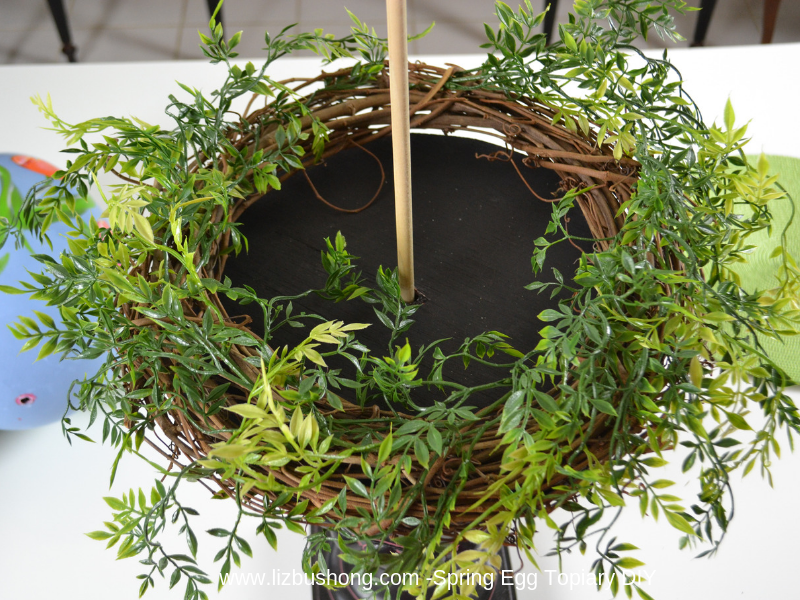
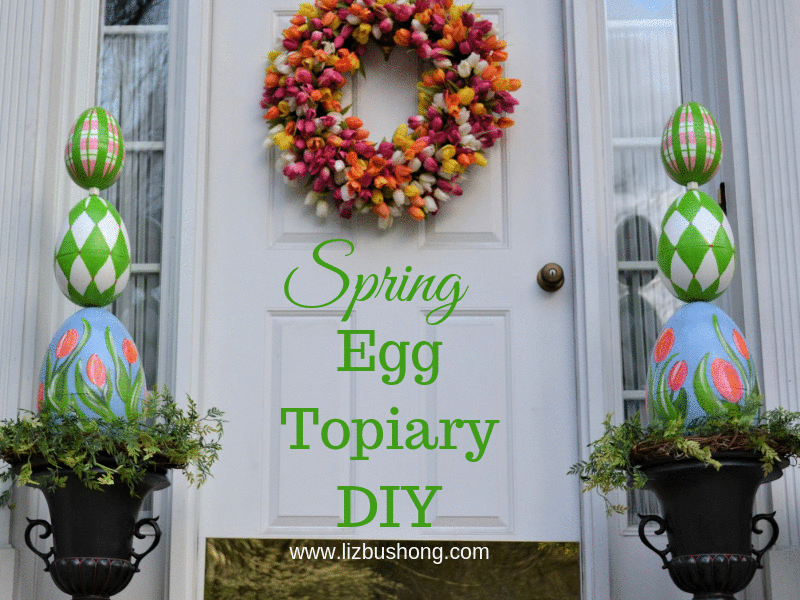
Place grapevine wreath over dowel onto disc. Wrap with faux greenery/vine. Position large painted egg on the dowel to the base of disc, add the second painted egg and last the top egg. TADA! All done!
Place your beautiful topiary on your front porch and enjoy it all Spring! Let me know how your’s turns out.
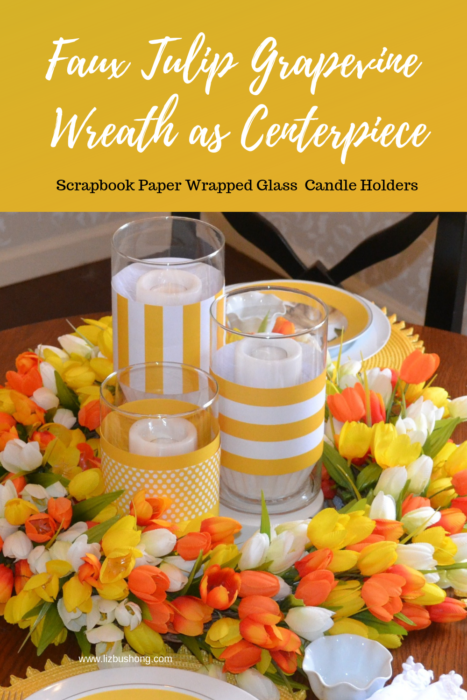
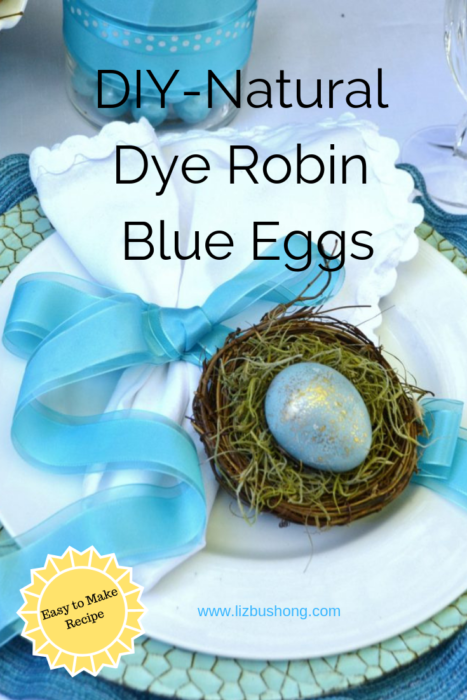
Other Ideas you might like to try: