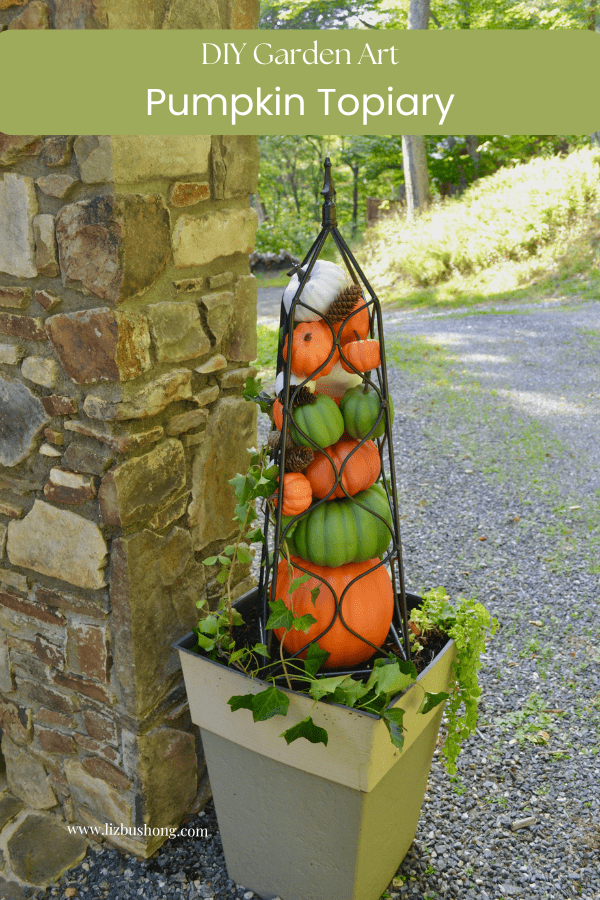
Looking for an easy pumpkin diy display that will make a grand entrance to your home? This Pumpkin DIY Topiary is a quick creation that you will be able to use each year, possible every season. What makes this topiary special is the tall orb frame. Shaped like a tall triangle faux pumpkins are stacked inside the frame to create a stacked topiary. Fresh or faux pumpkins you can decide. I used faux as not to worry about spoiling as well as to use this creation year after year. Also using faux pumpkins kept the cost down as many small pumpkins are needed to fill the space inside the form.
Garden Form Makes the Best DIY Pumpkin Topiary
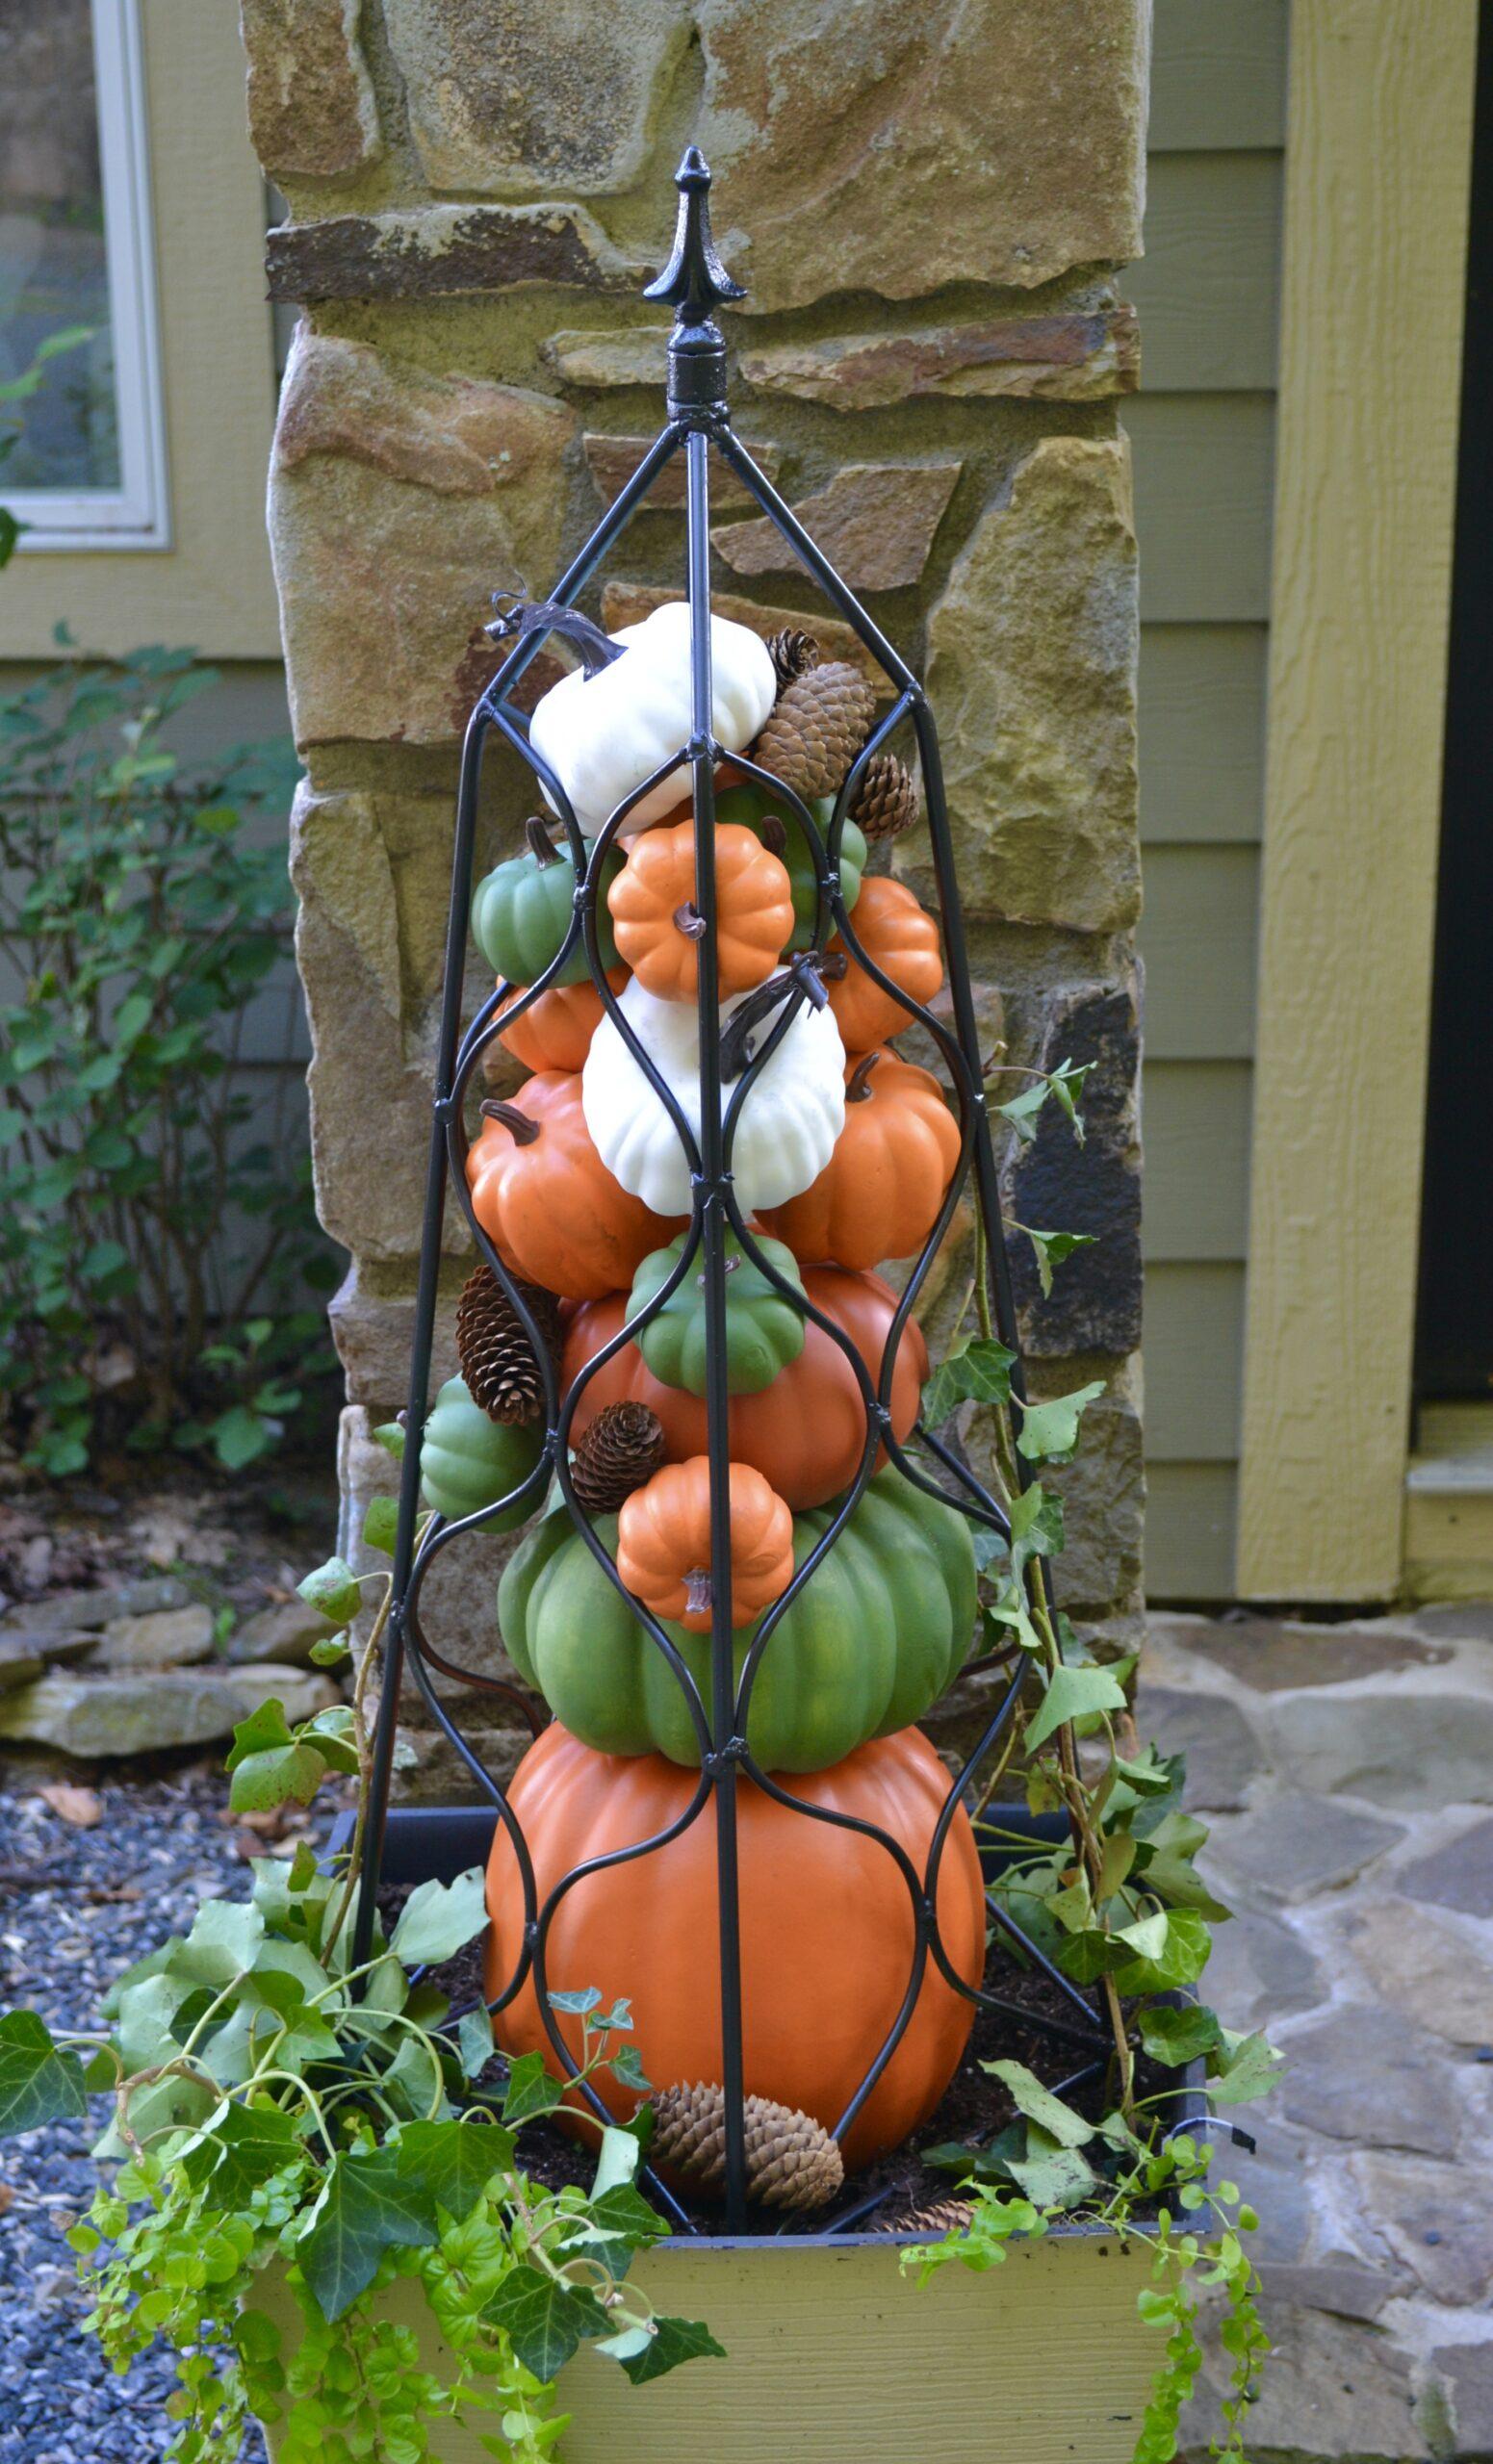
I found these Garden Forms on Etsy and had to buy them. The topiary is an iron 37″ tall triangular form with the widest part of the base 10″ perfect for a 10″ pumpkin. Not exactly how I was going to fill the form, I thought about all the ways I could use it. The frame is made of iron and has a pretty design on the body. I purchased two, one for each side of my front door.
Because the sides of the iron frame is flat, pumpkins easily fit inside. I began with three pumpkins, one 9″, 7″ , 5″ for the core structure. Then added several small 3″ and 2″ mini pumpkins as fill ins. You can use fresh pumpkins but the faux will last and can be used year after year. Besides they are as much as the real pumpkins in some cases why not save some money right? A quick trip to craft store (Hobby Lobby) and I found everything I needed. In addition, I added a few skinny tight pine cones to fill in where the pumpkin left a gap.
I love how the frame is flat on the sides and the pumpkins easily stay in place once you put them inside. I’ll explain that process in a minute. Also, the base of the frame left enough room for me to add seasonal greenery and later I will add fall flowers like petunias or small mums. The frame is heavy enough it will not blow over when the gently fall winds blow. It you can showcase this topiary on a covered porch that would be great and will prevent excess sun fading of the pumpkins. If you want to paint your pumpkins, you can just use acrylic paint. You can spray them with clear coat if you would like. I didn’t in this project.
How to Assemble the Pumpkin Garden Art Topiary
Gather your materials. They include 3 pumpkins, 9″, 7″ and 5 “. 10-15 mini pumpkins, 3 -4″ pumpkins, 1/4″ dowel rod cut 14” pinecones or other filling stems. Florist wire any gauge, wire cutters. Potted fall flowers, draping vines like elephant ear, creeping jenny, ivy.
How to Assemble Pumpkin Garden Art Topiary
Lay metal frame on a table, and fill with 4″ pumpkins with stems up to the point of the top.
Add minis to help fill in, then add 5″ pumpkin, 7″ pumpkin and last the largest or 9″ pumpkin. Hint: I used a 1/4″ dowel rod to stack these larger pumpkins making it easy to insert and stay in position on the bottom of topiary. Remove the stems from the 9 and 7″ pumpkins so pumpkins will sit flat on top of each other. You can leave the 5″ pumpkin stem on the pumpkin. The dowel rod is 14″ long.
While frame is on its side, and the bottom is facing you, wire the bottom to keep the pumpkins in place. I kept the wire on the paddle and wrapped around the 4 feet of the frame forming a large X over the bottom keeping the pumpkins from falling out.
Turn the form upright and yes some will fall out. LOL… But just refill between the design of the frame with mini pumpkins and pinecones. Tada!
Insert into tall flower base filled with dirt. Plant creeping jenny, or other trailing plant, ivy or your choice of fall flowers. When I created this for All About the Table Fall Magazine issue it was summer and I didn’t have fall flowers but you get the idea.
I am thinking about Christmas outside decor and will use the form to drape fresh evergreen stems, wiring them to the frame to create a living Christmas Tree look. I might add twinkle lights for fun and a festive red ribbon bow on the finial.

Why use this kind of frame?
The frame is heavy duty iron. it will withstand winds and being outdoors, that is if it is planted deep enough in the planter. One thing to think about is the proportion of the base and frame. Square base works great as it supports the frame and leaves a little extra for foliage. The base should be tall enough but not overpower the frame height. Your eye will tell when you see it. I also like to keep this under porch roof just so the rain or snow doesn’t hit the frame or pumpkins. If you are leaving your topiary out in the open, bring it inside if weather gets bad, you will want to keep this for year round use and in good shape.
The second reason I like this frame it is built very well, it will not fall over or bend like smaller grade frames can do. (tomato cage comes to mind. ) I thought about using a tomato cage but just didn’t like the look or feel to it. Granted you use alot of pumpkins in side this form but it is so pretty and festive. Hey.. you could also fill this frame with shatterproof Christmas ornaments, large to medium ones and fill in with mini’s and more. It is a fun investment you will enjoy using inside or out.
Hope you will try it. You can purchase this exact frame from Rustic Garden on ETSY.

Other Ideas You Might Like to Try: